Method for maintaining a bashrc file across multiple workstations using homebrew and github
Testimonial: Blake McDowell
Type: Software Workflow
This will assume familiarity with github repos and homebrew taps.
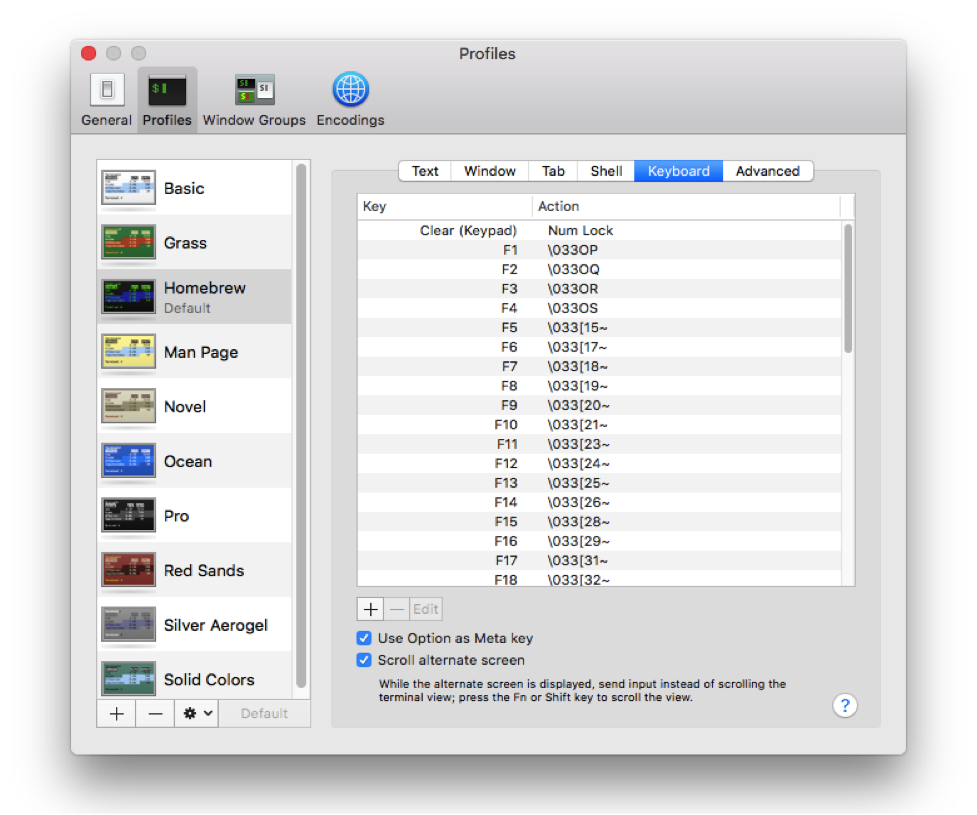
A bashrc file is shell script that Bash runs whenever it is started. Along with setting in the OS, the bashrc helps determine how your command line interface (CLI) or Terminal app looks and acts. In the Terminal app Preferences, there are many options for how you want the Terminal to look: what color scheme do you want? what type of cursor? should it blink? It is worth spending some time here and trying different effects. One, suggestion is to make sure “Use Option as Meta key” is checked. This will allow your cursor to quickly navigate the cursor forward and backward within Terminal text by pressing option+f or option+b. Read more about bashrc here or here.
In most cases, the bashrc is a hidden file that lives in your home directory, its path is ~/.bashrc or {USER}/.bashrc with {USER} being the login currently in use. The dot in front of the filename (.bashrc) hides the file from the GUI. Your OS GUI (the Finder on Macs) will not see it unless you specifically instruct it to. There are many, many hidden files on a OS system, the bashrc is just one of them.
Let’s take a look at NMAAHC’s bashrc file.
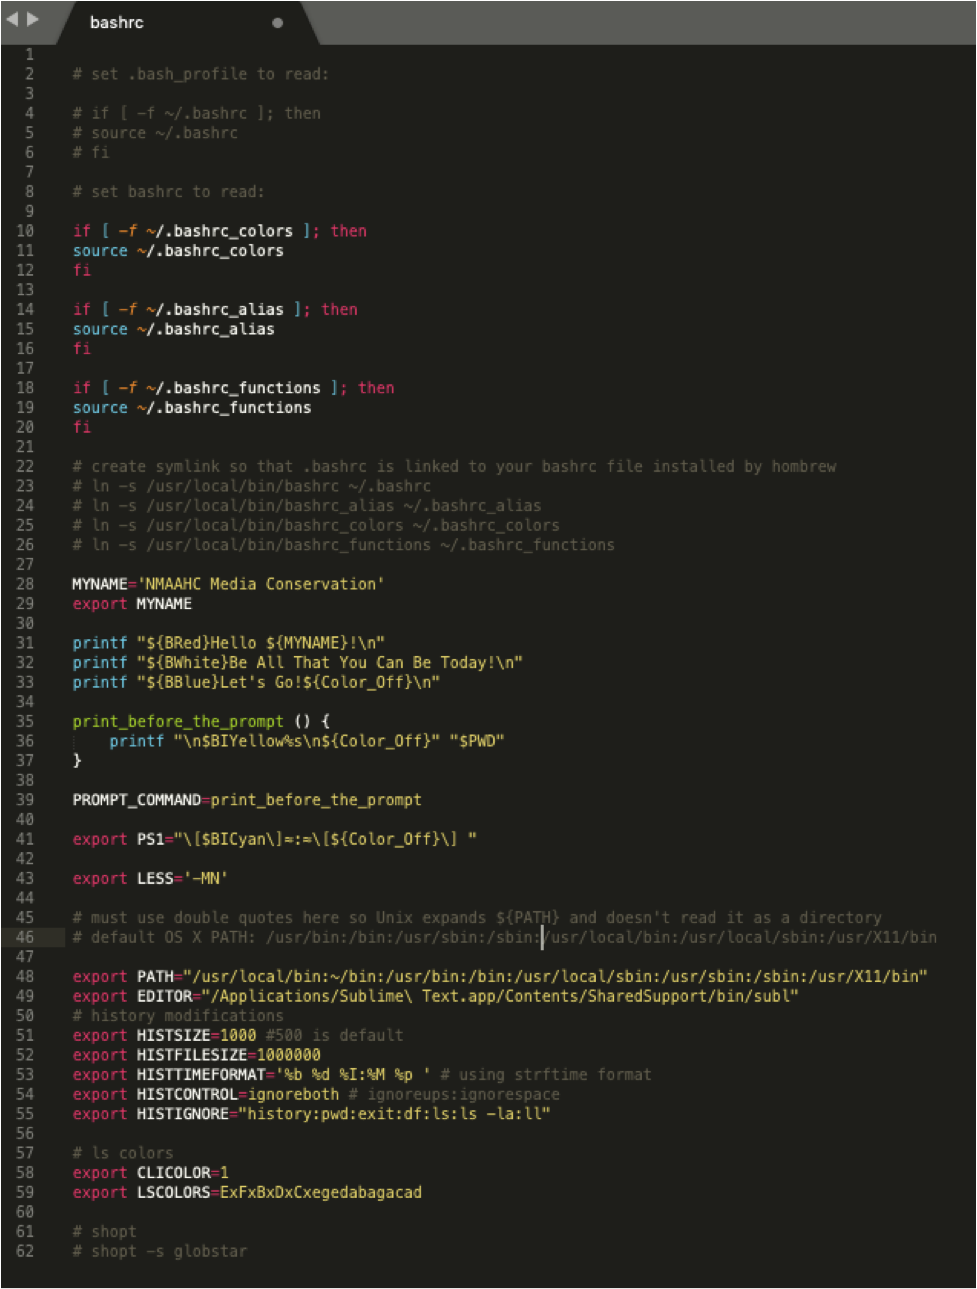
The first thing we see are some commented out code telling us to set our .bash_profile to read:
if [ -f ~/.bashrc ]; then
source ~/.bashrc
fi
That tells the computer that if there is a bashrc file then use it. If you want to read up more about the difference between the bashrc and the bash_profile you can start here and dive deeper. So, use whatever editor you like (I prefer nano for quick edits like this) and open your bash_profile file copy in the above code and save and close. Done.
Next we see three similar looking if/then statements:
if [ -f ~/.bashrc_colors ]; then
source ~/.bashrc_colors
fi
if [ -f ~/.bashrc_alias ]; then
source ~/.bashrc_alias
fi
if [ -f ~/.bashrc_functions ]; then
source ~/.bashrc_functions
fi
This tells the bashrc file that if the following files exist (.bashrc_colors, .bashrc_alias, bashrc_functions) then use, or source, them. We are going to create all three of those files in a moment.
# create symlink so that .bashrc is linked to your bashrc file installed by hombrew
# source /usr/local/bin/bashrc
ln -s /usr/local/bin/bashrc ~/.bashrc
ln -s /usr/local/bin/bashrc_alias ~/.bashrc_alias
ln -s /usr/local/bin/bashrc_colors ~/.bashrc_colors
ln -s /usr/local/bin/bashrc_functions ~/.bashrc_functions
These lines create symlinks for the files we are going to create in a moment. We’ll come back to this.
Here we create a statement that will print every time we initiate a non-login shell (or source our bashrc file) and we also define what we want our prompt to look like:
MYNAME='NMAAHC Media Conservation'
export MYNAME
printf "${BRed}Hello ${MYNAME}!\n"
printf "${BWhite}Be All That You Can Be Today!\n"
printf "${BBlue}Let's Go!${Color_Off}\n"
print_before_the_prompt () {
printf "\n$BIYellow%s\n${Color_Off}" "$PWD"
}
PROMPT_COMMAND=print_before_the_prompt
export PS1="\[$BICyan\]≈:≈\[${Color_Off}\] "
First we define the variable MYNAME as NMAAHC Media Conservation and we then export that variable for use in the bashrc. Then we create our statement and add some color to it - the {BWhite} {BBlue} {BRed} are defined in the bashrc_colors file we have yet to create. We then define out PROMPT_COMMAND variable (in this case our current working directory ($PWD) in yellow which will print before the prompt every time. Finally, we export our PS1 (aka the prompt) as ≈:≈
All this gives us the following:
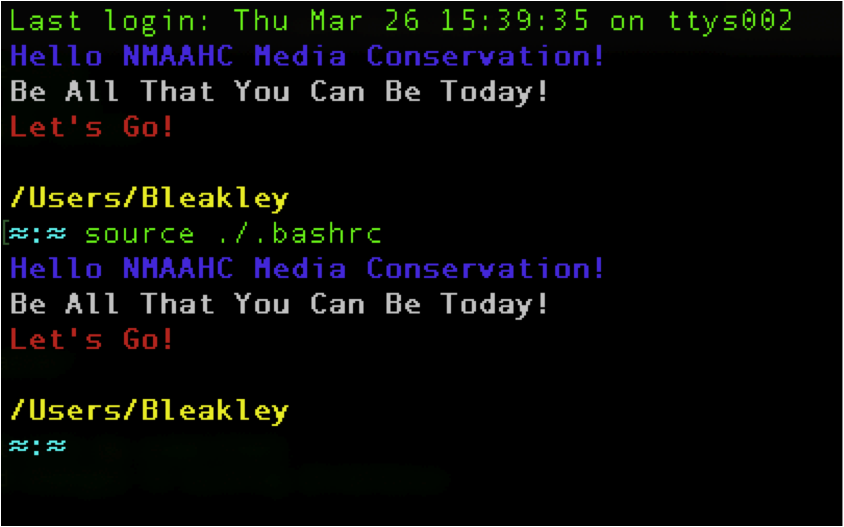
Our current working directory is displayed in yellow font, our prompt displayed in cyan and our encouraging message is displayed in blue, white and red representing the colors of the French flag and the commitment to liberté, égalité and fraternité.
Here is a longer explanation of how this all works. This is useful, too.
We export our LESS command so that it always shows line numbers and uses a long prompt. This is useful when scrolling through bash manual pages. Read about it here.
Next we export our PATH variable.
# must use double quotes here so Unix expands ${PATH} and doesn't read it as a directory
# default OS X PATH: /usr/bin:/bin:/usr/sbin:/sbin:/usr/local/bin:/usr/local/sbin:/usr/X11/bin
export PATH="/usr/local/bin:~/bin:/usr/bin:/bin:/usr/local/sbin:/usr/sbin:/sbin:/usr/X11/bin"
The PATH tells the computer in what order to look in directories when it searches for a command typed into the terminal. For Homebrew it is good to have /usr/local/bin come first. For more on PATH read here.
We then define some parameter for our bash HISTORY
# history modifications
export HISTSIZE=1000 #500 is default
export HISTFILESIZE=1000000
export HISTTIMEFORMAT='%b %d %I:%M %p ' # using strftime format
export HISTCONTROL=ignoreboth # ignoreups:ignorespace
export HISTIGNORE="history:pwd:exit:df:ls:ls -la:ll"
HISTSIZE=1000 allows us to see the last 1000 commands type into the terminal
HISTFILESIZE=1000000 (read about the difference between HISTFILESIZE and HISTSIZE here.)
HISTTIMEFORMAT – formats the time stamp in the history list
HISTCONTROL –telling history to ignore duplicated commands and commands with a space before them. Read.
HISTIGNORE – telling history to ignore specific, common commands
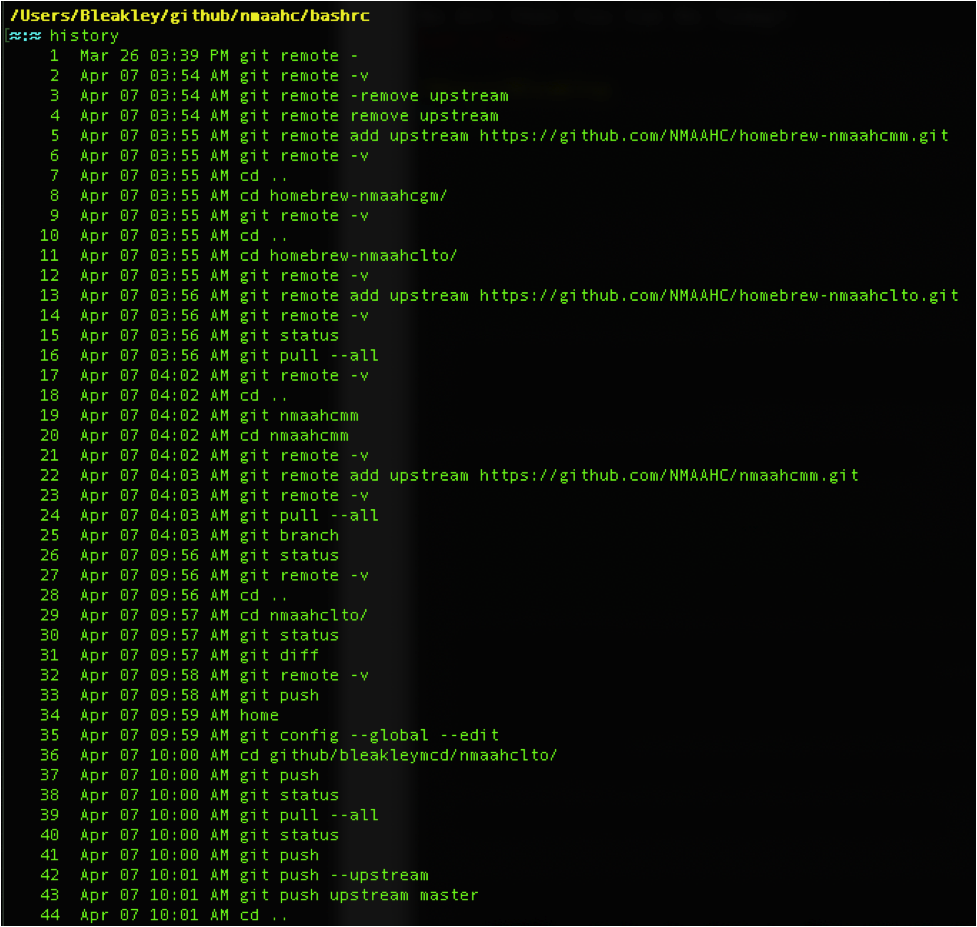
Typing history in the terminal will give something like this:
# ls colors
export CLICOLOR=1
export LSCOLORS=ExFxBxDxCxegedabagacad
Sets the command ls to use colors for directories, files, etc. Read. Or here.
OK. Now let’s go back to creating our three files bashrc_colors, bashrc_alias, bashrc_funtions
NMAAHC’s bashrc_colors file looks like this:

It is definitely overkill for what we use. Basically, it is a list defining ANSI escape codes for color so that when we want our prompt to be Bold Cyan we type BCyan and not the escape code. It makes the bashrc much easier to read and you don’t have to memorize that \e[0;35m is purple. You can read a lot about it (and other useful stuff!) here and here.
NMAAHC’s bashrc_alias looks like this:
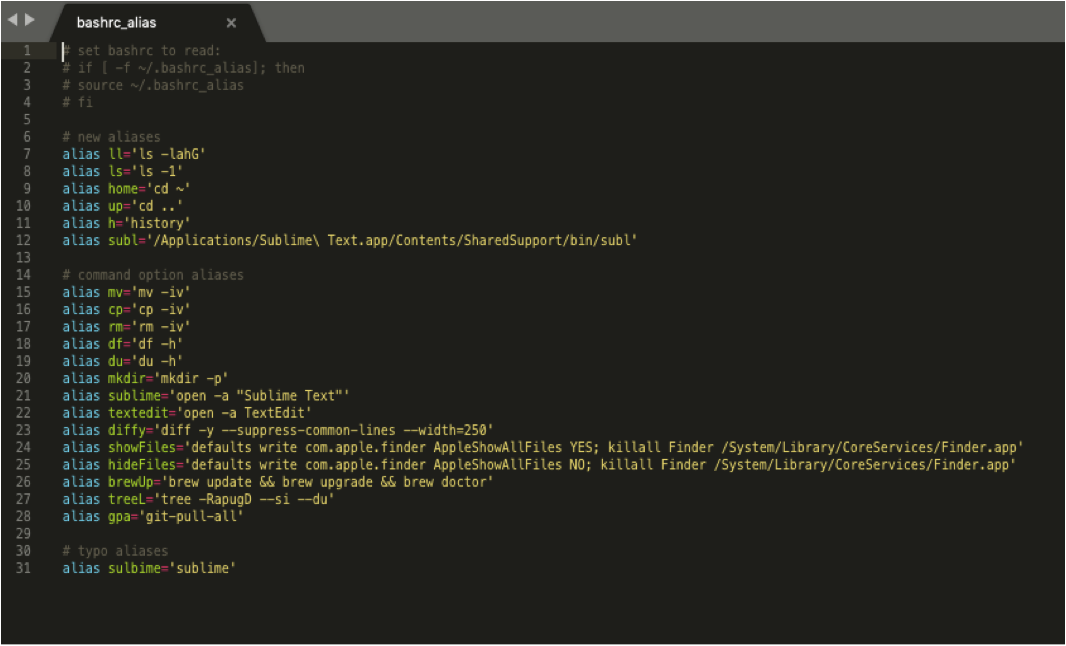
Aliases are keyboard shortcuts, which are great to have on the command line. Let’s look at the ones NMAAHC uses.
alias ll='ls -lahG'
typing ll calls ls -lahG which causes the output to be listed in long format (l), include hidden files (a), display the size in a 3 digit format in byte, kilobyte, megabyte, etc. (h), colorized output (G). The letters -IahG are referred to as flages and apply option to a bash command. Type ‘man ls’ in the terminal to read more about the Is command.
alias ls='ls -1'
typing ls calls -1 which forces output to be one entry per line.
alias home='cd ~'
typing home calls cd ~ which will take you to your home directory.
alias up='cd ..'
typing up calls cd .. which moves the working directory up one directory. Try typing cd .. in the terminal to see how this works.
alias h='history'
typing h calls the command line history
alias mv='mv -iv'
typing mv calls mv iv which causes mv to write a prompt to standard error before moving a file that would overwrite an existing file (i) and verbose ouput, showing files after they are moved (v). Type ‘man mv’ in the terminal to read more about it.
alias cp='cp -iv'
typing cp calls cp -iv which causes mv to write a prompt to the standard error output before copying a file that would overwrite an existing file (i) and verbose output, showing files as they are copied (v). Type ‘man cp’ in the terminal to read more about it.
alias rm='rm -iv'
typing rm calls rm -iv which causes mv to request confirmation before attempting to remove each file, regardless of the file's permissions, or whether or not the standard input device is a terminal (i) and to be verbose when deleting files, showing them as they are removed (v). Type ‘man rm’ in the terminal to read more about it.
alias df='df -h'
typing df calls df -h which causes df to display "human-readable" output using unit suffixes: Byte, Kilobyte, Megabyte, Gigabyte, Terabyte and Petabyte in order to reduce the number of digits to three or less using base 2 for sizes. Type ‘man df’ in the terminal to read more about it.
alias du='du -h'
uses typing du calls du -h which causes du to display "human-readable" output using unit suffixes: Byte, Kilobyte, Megabyte, Gigabyte, Terabyte and Petabyte. Type ‘man du’ in the terminal to read more about it.
alias mkdir='mkdir -p'
typing mkdir calls mkdir -p which causes mkdir to create intermediate directories as required. Type ‘man mkdir’ in the terminal to read more about it.
alias sublime='open -a "Sublime Text"'
typing sublime will open the application Sublime Text (our editor of preference) if it is installed.
alias te='open -a TextEdit'
typing te will open the application TextEdit.
alias diffy='diff -y --suppress-common-lines --width=250'
typing diffy calls the diff command with flags that cause it to output in two columns, not display common lines and have a width of 250 characters. Useful alias for comparing checksum files. Type ‘man diff’ in the terminal to read more about it.
alias showFiles='defaults write com.apple.finder AppleShowAllFiles YES; killall Finder /System/Library/CoreServices/Finder.app'
typing showFiles (no space, capitalization matters) will cause all hidden files (those with a leading . in their filename) to appear in the OS GUI or Finder in Mac environments. Test it on a Mac and then go into your home directory in the Finder.
alias hideFiles='defaults write com.apple.finder AppleShowAllFiles NO; killall Finder /System/Library/CoreServices/Finder.app'
like the above but hides the files.
alias brewUp='brew update && brew upgrade && brew doctor'
typing brewUp calls brew update upgrade and doctor, threw homebrew commands often needed. Read more about homebrew here. Read about connecting commands with && here.
alias treeL='tree -RapugD --si --du'
typing treeL calls tree -RapugD --si --du which causes tree to recursively cross down the tree each level directories, and at each of them execute tree again (R), print all files including hidden ones (a), Print the file type and permissions for each file (p), print the username of the file (u), print the group name of the file (g), print the date of the last modification time (D), Print the size of each file but in a more human readable way in powers of 1000 (si), and for each directory report its size as the accumulation of sizes of all its files and sub-directories and the total amount of used space is also given in the final report (du). Type ‘man tree’ in the terminal to read more about it.
alias gpa='git-pull-all'
this is a new alias for NMAAHC. To use it you have to install from https://www.npmjs.com/package/git-pull-all. It allows executing a git pull on multiple git repositories in parallel. Huge time saver if you end up working at a terminal with git repositories that have not been updated in a while.
# typo aliases
alias sulbime='sublime’
Typos!
NMAAHC’s bashrc_functions looks like this:
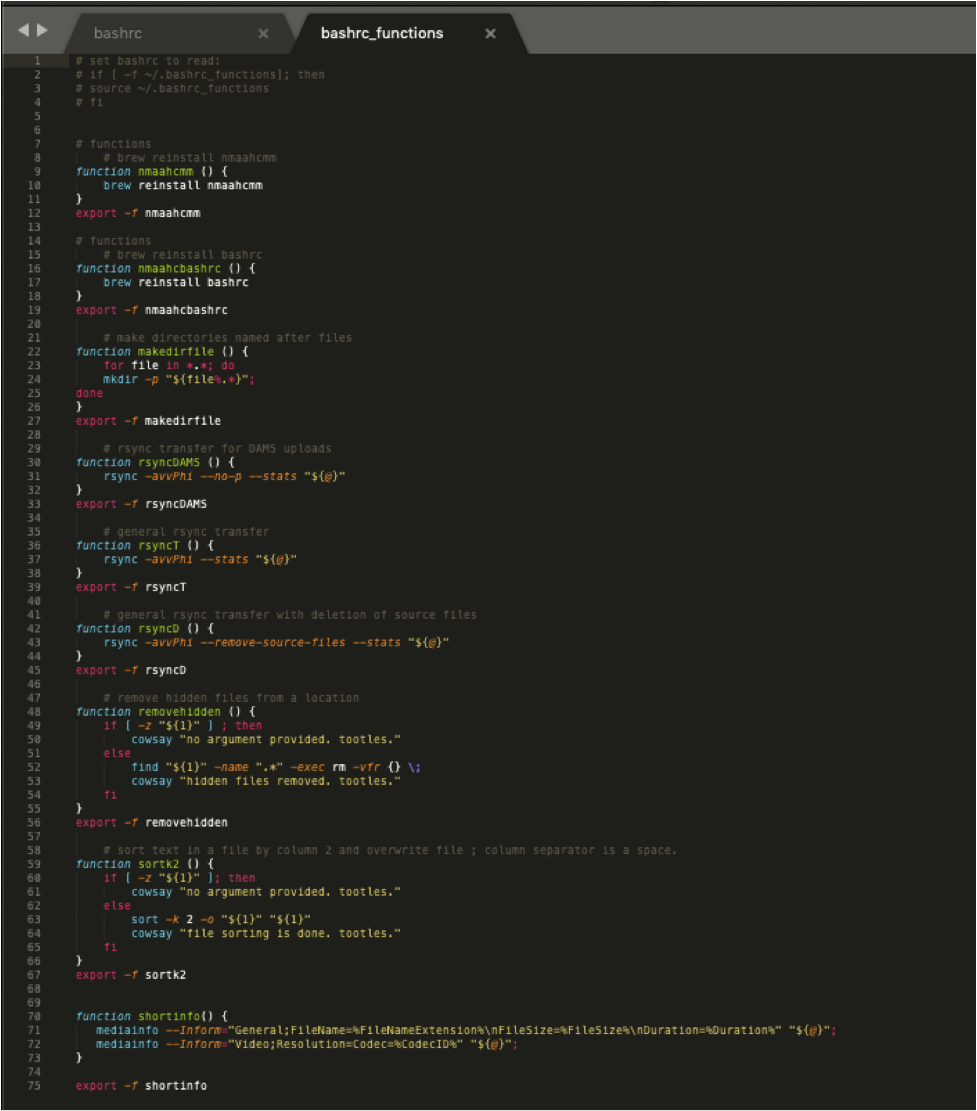
A Bash function is a set of commands that can be called numerous times. The purpose of a function is to help you make your bash scripts more readable and to avoid writing the same code over and over again. Read more about bash functions here.
Let’s look at the ones NMAAHC uses.
# functions
# brew reinstall nmaahcmm
function nmaahcmm () {
brew reinstall nmaahcmm
}
export -f nmaahcmm
This function calls homebrew and reinstalls our nmaahmm microservices. You can follow this general function structure, or others like it, if you want to write similar functions for your bashrc. Type nmaahcmm into the terminal to run this function.
# functions
# brew reinstall bashrc
function nmaahcbashrc () {
brew reinstall bashrc
source ~/.bashrc
}
export -f nmaahcbashrc
This function calls homebrew and reinstalls our bashrc file and then sources it from our home directory. Type nmaahcbashrc to run this function.
# make directories named after files
function makedirfile () {
for file in *.*; do
mkdir -p "${file%.*}";
done
}
export -f makedirfile
This function will create directories named after files, a sometimes-useful thing. Simply type makedirfile into the terminal and then drag the files you want directories made from into the terminal as well. Hit return and the directories will me bade in the current working directory, i.e. where you are in the terminal.
# rsync transfer for DAMS uploads
function rsyncDAMS () {
rsync -avvPhi --no-p --stats "${@}"
}
export -f rsyncDAMS
This function calls rysnc with flags that make it work will with Smithsonian’s DAMS. (a) archive mode; equals -rlptgoD (no -H,-A,-X); (vv) A single -v will give you information about what files are being transferred and a brief summary at the end, two -v options will give you information on what files are being skipped and slightly more information at the end; (P) show progress during transfer and keep partially transferred files; (h) output numbers in a human-readable format; (i) output a change-summary for all updates; (no-p) turns off the implied option -p in the -a flag (we found this was necessary when transferring files to Smithsonian DAMS otherwise the files would continually overwrite); (stats) in brief, tells rsync to print a verbose set of statistics on the file transfer. rsync can do a lot of different things and is a great file transfer tool. It is worth spending some time reading the ‘man rsync’ page to learn about all the various options. “${@}” tells the function to run on whatever files or directories you have dragged into the terminal after typing rsyncDAMS.
# general rsync transfer
function rsyncT () {
rsync -avvPhi --stats "${@}"
}
export -f rsyncT
Same as above but keeps the -p flag implied in the -a flag, which is generally a good thing. We use this function for transferring files to anywhere that is not our DAMS.
# general rsync transfer with deletion of source files
function rsyncD () {
rsync -avvPhi --remove-source-files --stats "${@}"
}
export -f rsyncD
Same as above but will remove the source files after transfer is successfully completed. Use with caution but very useful if used carefully. We will often run it after running a successful rsyncT.
# remove hidden files from a location
function removehidden () {
if [ -z "${1}" ] ; then
cowsay "no argument provided. tootles."
else
find "${1}" -name ".*" -exec rm -vfr {} \;
cowsay "hidden files removed. tootles."
fi
}
export -f removehidden
Typing removehidden will remove all hidden (filenames starting with .) from a specificed location.
# sort text in a file by column 2 and overwrite file ; column separator is a space.
function sortk2 () {
if [ -z "${1}" ]; then
cowsay "no argument provided. tootles."
else
sort -k 2 -o "${1}" "${1}"
cowsay "file sorting is done. tootles."
fi
}
export -f sortk2
Sorts a file, usually a .txt or .md5 file, by the second column in a file. Usefule for comparing checksum manifest when both files are in this format HASH (space) FILENAME.
function shortinfo() {
mediainfo --Inform="General;FileName=%FileNameExtension%\nFileSize=%FileSize%\nDuration=%Duration%" "${@}";
mediainfo --Inform="Video;Resolution=Codec=%CodecID%" "${@}";
}
export -f shortinfo
A function calling mediainfo to pull up certain info on files. Can be useful if customized well.
Ok. Now that these three files are created, make sure they are in your homebrew bashrc repo and are included in your homebrew tap:
def install
bin.install "bashrc"
bin.install "bashrc_alias"
bin.install "bashrc_colors"
bin.install "bashrc_functions"
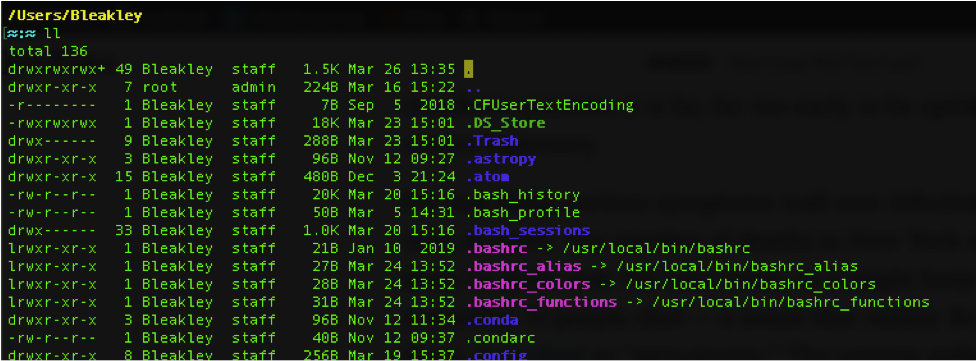
Now when you install bashrc via homebrew and source your file at /usr/local/bin/bashrc it will create all the symlinks so the files in your home directory will be linked to the ones installed by homebrew. Your home directory will look like this if everything went according to plan.
Nearly all of what is demonstrated here is completely optional when setting up a bashrc file. You may find you have no need for any of it. But, if you spend any time in at the command line during your daily work, we hope at least some of the information contained in this Cool Tool will be of use.